Aiptek Apc400 Driver Xp
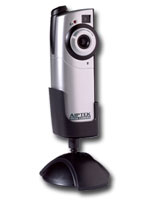
AipTek Hyper VCam Mobile APC400 driver download Web camera, webcam for windows free.
Aiptek apc400 drivers

14 files:
Model:apc400
Vendor:AIPTEK
Version:5.30.27
Filesize:1 MB
Operating system:Win NT, Win Home Server, Win Server 2008 R2, Windows Server 2008, Win 98 SE, Win 7, Win XP
Download file
Version:2.96
Filesize:9 MB
Operating system:Windows Home Server, Windows 95, Windows 98, Win Server 2003, Windows Me, Win 7, Win XP
Version:9.94.81
Filesize:972 KB
Operating system:Win Server 2003, Win Server 2008, Win NT, Win 7, Win XP
Version:1.96.32
Filesize:6 MB
Operating system:Windows Home Server, Win 64-bit, Win 7, Win XP
Version:3.96
Filesize:95 MB
Operating system:Windows XP, Win 2000, Win Server 2008 R2, Win 7, Win XP
Version:6.16.34
Operating system:Windows Server 2003, Win 7, Win XP
Version:6.70.88
Operating system:Windows 95, Win 7, Win Me, Win XP
Version:9.78
Operating system:Windows Server 2008 R2, Win Server 2003, Win 2000, Windows 95, Win 7, Win XP
Version:1.33
Filesize:10 MB
Operating system:Windows 7, Windows Server 2008, Windows Vista, Win 98, Win 7, Win XP
Version:0.75.15
Filesize:5 MB
Operating system:Win Vista, Win Server 2008 R2, Windows Vista, Win Me, Win 7, Win XP
Version:9.82.75
Operating system:Windows NT, Win Vista, Windows 98 SE, Windows Server 2003, Win 7, Win XP
Version:3.67.66
Filesize:8 MB
Operating system:Win 95, Win Home Server, Win 7, Windows 95, Win XP
Version:3.30.73
Operating system:Windows XP, Win 95, Win 7, Win XP
Version:6.17.70
Filesize:82 MB
Operating system:Windows 2000, Windows Server 2003, Win 7, Win XP
PNPID:
PCI VEN_FE07 DEV_923C SUBSYS_FF40EB56 REV_09 2 DD84A74E 8 BD50
PCI VEN_FE07 DEV_7B38 SUBSYS_6722D5BA REV_03 5 DB2DF85B
PCI VEN_FE07 DEV_FFA5 SUBSYS_D5462CD5 REV_01 9 ED81712C
PCI VEN_FE07 DEV_59A8 SUBSYS_F1957DC5 REV_03 8 6655849D 7 FDA3
PCI VEN_FE07 DEV_5AEB SUBSYS_76F6E2F9 REV_07 3 35E63D86 1 2E41
PCI VEN_FE07 DEV_2DE7 SUBSYS_446E53FF REV_02 2 4180A40E
Supported OS:
Win Server 2003, Win NT, Windows Me, Windows Server 2008 R2, Windows 98 SE, Windows 95, Windows 64-bit.
Aiptek Hyper Vcam Mobile APC 400 Driver for Windows XP / 2000 Download Aiptek Hyper Vcam Mobile APC 400 Drivers Vendor: Aiptek: Model: Hyper Vcam Mobile APC 400.

Aiptek apc400 drivers. 14 files: Model: apc400: Vendor: AIPTEK: Win Home Server, Win Server 2008 R2, Windows Server 2008, Win 98 SE, Win 7, Win XP : Download file.
NOTICE: Aiptek s current Camera driver release resolves driver conflicts, improves your computer s stability and restores communication with all Cameras. The newly released Camera drivers are a high priority update recommended for all Aiptek users.
Installation Instructions:
Click above Download link or Click here to begin installer download.
Click Run Save As if using Firefox
Click Run Again
Follow on-screen prompts to complete installation.
Important: If you are using Firefox or Netscape as your browser, you will be directed to save the application to disk we recommend that you save the application to your desktop.
We recommend that you save it to your desktop and initiate the free scan using the desktop icon. Should you choose not to save the application, you may simply initiate the free scan by clicking the Run button on the File Download Window.
You can also search for a specific driver below:
Update Your DriversTroubleshooting
Troubleshooting Tips for Digital Cameras
A
variety of problems can occur that prevent a connection between the
camera and the computer. If connection is not established, try the
following procedures in the order given. Once connection is
established, downloading should begin and no further troubleshooting
will be required.
Step one: Properly connect the camera and the computer
Before
discussing possible solutions, make certain that you have properly
installed your camera software that was shipped with your camera
and you have properly connected the camera to the computer in the
following order.
Close all programs and temporarily disable any virus protection software.
Insert the camera software CD into the CD drive and follow the on-screen instructions.
If the installation screen does not appear, click Start, Run, and type D: Setup.exe, where D is the letter of your CD drive.
Click OK.
When the software has finished installing, re-enable the virus protection software.
If you have selected images for sharing or printing, verify that the computer is connected to a printer and/or the Internet.
Turn off the camera.
Connect the camera to your computer either:
Directly with the USB cable that was shipped with the camera Fig. 1.
Or with a dock or cradle and USB cable that was shipped with the camera Fig. 2.
Turn on the camera.
The camera should display Connected to computer on the Image Display.
If so, follow the instructions on the computer screen to transfer the images.
Figure 1: Directly Connecting with a USB Cable
Figure 2: Connecting with a Cradle or Dock and USB Cable
Step two: Check the USB connection
Disconnect and then reconnect the Universal Serial Bus USB cable. The camera can stall at Establishing connection if the cable is not fully inserted into the camera.
Try using a different USB port:
If the camera is inserted into a front port, try using a port on the back of the computer.
If the camera is inserted into a back port, try using a port on the front of the computer.
If you are using a USB hub, try connecting directly to the computer.
If you are not using a USB hub, try using a USB hub if one is available.
Check the condition of the USB cable. Replace the cable if there is visible damage.
Step three: Install the latest firmware
1. Check that the latest firmware version is installed on the camera by going to the your manufacturer s web site, find the correct product, and follow the
online instructions to download and install the latest firmware version
Step four: Remove any unused USB devices from the computer
On the computer, click Start, Settings, and double-click Control Panel. On Windows XP, click Start, and then click Control Panel.
Double-click Add/Remove Programs.
Select the software for any unused USB devices, and click Remove.
Open Device Manager and uninstall the unused USB devices by following the steps below:
Right-click My Computer and left-click Properties. With Windows XP Pro, left-click Start, select My Computer, and select view system information under System Tasks.
On the resulting System Properties window, click Hardware tab, and then Device Manager button.
Right-click the unused devices and select Uninstall.
Disconnect any other USB devices that are not being used, except the keyboard and mouse.
Restart the computer, if you are prompted to do so.
Step five: Check the camera status in Device Manager
Connect the camera and computer using the USB cable.
Follow the steps below to open Device Manager.
If
the camera USB mode is Digital Camera, the camera should be listed
under Imaging Devices. Look for items that pertain to the camera for
example, USB Camera, HP xxx Digital Camera, Canon Digital Camera, Unknown Device. Check
under Imaging Devices, and if necessary, Other Devices, and Universal
Serial Bus Controllers by clicking the plus sign.
Highlight the camera entry and then click Properties or double-click the device to open Properties.
The device status should be OK no errors.
the conditions in the previous step are not met, check the Device
Status window on the General tab for information about the cause of the
communication error Code 19 is the Klez Virus. .
This
window will also provide information to resolve the issue for example,
Re-Install Driver, Install Driver. If it does not, then close the
Properties window for the camera or unknown device and highlight the
item. Click Remove at the bottom of Device Manager. You may need to right-click the item, and then select Remove or Uninstall .
If the camera USB mode is Disk Drive, the camera should be listed under Disk Drives.
Highlight the camera entry and then click Properties or double-click the device to open Properties.
The device status should be OK no errors, and the driver provider on the General tab should be Microsoft.
Refresh the Device Manager. Select Action at the top of Device Manager, and then select Scan For Hardware Changes.
The camera should now be listed properly under Imaging Devices.
Step six: Check the USB status in Device Manager
Open Device Manager by following the steps given below:
Check
the Universal Serial Bus controllers entry for question marks,
exclamation points, or whether the entry does not exist. Expand Universal Serial Bus controllers entry by clicking the plus sign next to the Universal Serial Bus
controllers entry and check USB host controllers and USB root hubs. If
the devices are not listed or have question marks or exclamation points
next to them, contact the computer manufacturer.
Step seven: Ensure that the imaging software is installed correctly by removing and reinstalling the software
On the computer, click Start, Settings, and double-click Control Panel. For Windows XP, click Start and then Control Panel.
for any copies of the imaging software. If multiple copies exist, remove them all.
After all copies of the software have been removed, restart the computer.
Once the computer is restarted and the main screen displays, right-click Start, and then click Explore.
Ensure the camera is disconnected from the computer and reinstall the
imaging software. This can be done from either the camera CD or the
manufacturer s support web site.
Follow these steps to reinstall the iImaging software from the camera CD:
Put
the Installation CD you received with your camera into the computer and
run the installer. The installation window automatically appears.
Click Next, and then follow the on-screen instructions to install the software.
Follow these steps to reinstall and upgrade the software from the manufacturer s web site.
Visit your manufacturer s website or click here to have us scan your system for the correct driver. For a list of manufacturer websites click here.
Select the correct model and download Driver. The system will then provide installation instructions.
Connect the camera to the computer and try to unload the images again.
Upgrade smoothly by finding the correct drivers for your camera for any version of windows. For the first time, users can upgrade with confidence knowing that their computer will run smoothly thanks to the latest drivers and updates required for a perfect upgrade.

The following is the important information of Aiptek HyperVCam home APC 400 installation driver. Click on Download Now and a File Download box will appear.
Supported OS: Win XP, Win 98 SE, Windows Me, Win 98, Windows 98, Windows XP, Win Server 2003, Windows 98 SE, Windows Server 2003, Windows NT, Win Me.
Aiptek Download Area: Driver, Firmware, Manuals, Downloads Dear customer, to Here you can also find all drivers for Windows XP.
File Name: aiptek_apc400_vista.exe Version: 1.3.8 Driver Date: 13 January 2012 File Size: 22,816 KB Available for: Windows 8, Windows XP, Linux, Mac OS, Windows 98.